3D Printed Mini-Shells You Can Assemble and Shoot at Home!
Fireworks making uses a lot of pretty primitive tech. Over the years creative fireworkers have augmented their age-old art with new methods and occasionally some high-tech tools. From automatic computer controlled shell pasting machines to today's 3D printed firework parts the world of fireworking is advancing into a new era of creativity.
Today's project uses an assortment of 3D printed plugs and a 3D printed mortar base to help you dip your toes into what you can do when you combine high-tech with low-tech fireworking!
If you haven't already, jump on over to Skylighter's 3D files page and download and print the following items:
- 3D Print: Fuse Plug for TU2032 - Mini Shell
- 3D Print: Solid Plug For TU2032 - Mini Shell
- 3D Print: Mortar Base For TU1375
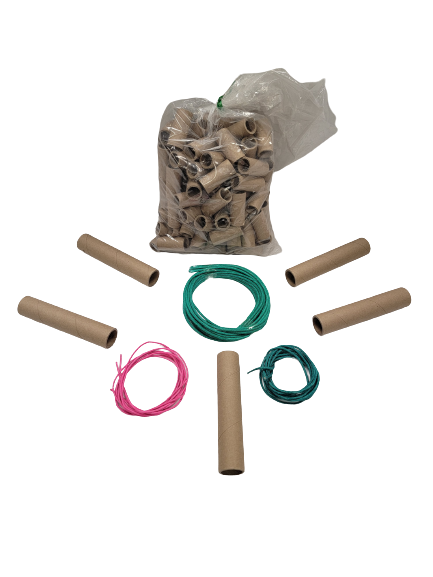
Next gather the following items you'll need to build the project.
Tools and materials You'll Need to Build This Project:
- Personal protection (PPE) - Safety Glasses, Goggles or Face Shield, and Cotton or flame-resistant clothing
- Masking Tape
- Hot Glue gun
- Razor cutter
- 1/8" drill bit and drill
- Titebond II Wood Glue (adequate adhesive to assemble both mortar and canister parts.)
- (optional) Minwax Wood Hardener
- (optional) Flux brush (to apply glue)
- (optional) Small Funnel
- Ruler or Measuring Tape
- Small Scale with (tenth gram increments)

You will also need a source for black powder to use as lift, burst and prime for your new mini-shells. If you have access to commercial 2Fg black powder you can use that, though you will have to crush it to a finer grain size to make your prime, or you can use one of Skylighter's Black Powder Kits. Sorry Pyrodex and other black powder substitutes will not work.
You will also need an "effect" to load your mini-shells with. This can be homemade stars or effects fuse. Skylighter offers a wide assortment of effect fuses and star kits so the possibilities with this kit are only limited by your imagination!
**Before we begin any project, Safety is the First Priority. You are working with highly energetic and explosive compounds. Read and understand all instructions prior to building. Keep your work area clean and uncluttered and keep all energetic materials in closed containers in a safe storage place. Only bring out the minimum amount of material needed. Wear your personal protective equipment and proper clothing. This list is incomplete, YOU are responsible to exercise your due diligence to follow all requisite safety requirements. **
Assembling Your Mini Mortar:

To start drill an 1/8" fuse hole in the mini mortar tube 3/4 - 7/8 inch from one end. This hole will serve as your passfire\ignition fuse hole.
Optional Step: To extend the tube life and passfire (fuse hole), I recommend using Minwax Wood Hardener. A heavy coat around the passfire hole will prevent it from enlarging due to repeated firing. The entire tube can be treated this way to extend its life. For more information read: Make Cardboard Mortar Tubes Last a Long Time - If applied to the entire tube it should be set aside to dry overnight before proceeding. If you only apply around the passfire you can proceed to attaching the base.
To attach the 3D printed base spread a generous amount of titebond glue around the plastic base. Next put a dab of titebond glue on your finger and smear it around on the inside of the tube just below the fuse hole. Now, slip the tube over the plastic 3D printed base and seat it firmly in place. Wipe off any excessive glue and let the glue dry overnight.
Once dried, place a finger over the passfire hole and with your breath pressurize the mortar tube. If you have excessive air leaks apply a little more glue around the base inside and out. The tube does not need to be air tight, but if you have a poor glue joint this should be addressed.
Assemble the Mini Canister Shell:
For each mini-shell you assemble you will need 2 3D printed plugs. One with a Visco delay fuse hole, and one with a sealed end. The plug with the hole will have a length of Visco fuse installed which provides the delay as the shell ascends into the sky. The hole is oversized to allow a wide assortment of fuses to be used, and also to allow for careful timing of when the shell performs in the sky.
If you have ever worked with Visco fuse you have likely seen how it ejects sparks and burns away as the flame front progresses along its length. This process is referred to as "side spit" in fireworking lingo. Side spit is how fuse passes fire to burst, stars, or anything in your shells payload. We need to control when the sparks from the fuse ignite the payload of your shell so we will be wrapping the fuse in some masking tape to keep all of those sparks contained until we are ready for them. The length of fuse covered by the masking tape defines the length of delay.
To put it another way, if your fuse burns at 30 seconds per foot then a 1-inch length of fuse covered with masking tape will take 2.5 seconds to burn from one side of the tape to the other side. If you covered 2-inches with tape that delay would double to 5 seconds. Depending on the fuse you select, the burn rate will be different. Also, the fuse can burn at different speeds batch to batch or even depending on the humidity so always start by timing a 12-inch length of your fuse to determine its burn rate. Now that you know its burn rate you can calculate how many seconds it takes for an inch of fuse to burn by dividing your time by 12 (e.g. 30 sec/ft divided by 12-inches = 2.5-seconds per inch).
You'll also want to customize the delay time of your shells to get just the right height in the sky so that your stars burn out before coming in contact with the ground. For our experiments that delay was about 4 seconds, so we need to cover about an inch and a half of Visco fuse. You will also need around 1/4-inch of fuse on either end of your tape to prime so remember to add 1/2-inch to your final cut length of fuse.
Remember this is a starting point so each time you change your payload, build a shell and test its performance you may wish to add or subtract delay time for your configuration!
With our delay known, and fuse speed measured we can cut a 2-inch piece of Visco fuse at a 45 degree angle on both ends. This angled cut will expose more of the black powder core and help us apply the prime to our fuse (more on prime in a second, first lets get that fuse wrapped).
To prevent the "side spit" from setting your shell off to soon, we calculated we need to tightly wrap 1.5-inches of fuse with masking tape. In the image below you can see us wrapping the fuse with a tight spiral pattern until about 1.5-inches are covered.

With your fuse wrapped test fit it in the plug with the Visco delay fuse hole. It should be a snug fit, if not apply a little more tape until it is. Next, we want to insert the fuse from the inside end of the plug until around 1/2-inch is exposed through the hole.
Now we can secure and seal the delay fuse with some hot glue inside and out. Remember when your lift powder ignites there will be instantaneous, high-pressure fire inside the mortar. If there is even a pinhole it could get into your shell and cause it to prematurely perform. No one likes a premature explosion, so seal it up good.


Finally with our Visco delay fuse plug assembled we need to prime the ends to ensure it takes and passes fire easily. We need a black powder paste, or slurry we can dip our fuse in, and we will need a little finely granulated black powder to take fire easily. There are many ways to make a black powder slurry. For instance, if you are using Redgum Black Powder then adding a little denatured alcohol until your granules turn into a paste works well. For commercial black powder or homemade black powder adding 3% dextrin to finely powdered black powder and wetting with water until a paste is formed works well. Your shooting for a pancake batter like consistency.
For each end of your fuse, dip first into your slurry then immediately dip it in your finely granulated black powder. This will ensure your Visco delay fuse takes fire and passes fire consistently!

Optional Tip 1: You can use black powder and nitrocellulose for a faster drying prime. Make the slurry as above using Nitrocellulose lacquer instead of dextrin and water.
Optional Tip 2: Your project files contains 2 Visco delay plugs, the flat-ended plug we used in the pictures, and a cavity-ended plug which is used for creating rising effects! The rising effects plug is assembled as shown above, but it has a trick up its sleeve. Once the cap is assembled you can fill that cavity with star comp which will burn on the ascent creating a colored tracer or spark tail depending on the comp used. We really loved the effect using D1 Glitter, Red Rubber stars, and black powder with coarse titanium. All looked lovely on the way up! It is a simple way to add some pizzazz to your shells!
With both ends of your fuse primed, your ready to install the plug into the shell body. Just as we did when assembling our mortar tube we apply Titebond to both the 3D printed plug and to the inside of our tube and press the two together.

Adding your payload
These small shells allow your creativity to lead the way. They are small enough for experiments without taking a lot of time, or consuming pounds of your valuable chemicals. In our project here we are going to assemble our shells with 2 different payloads: 1) Effects fuse and 2) Homemade stars.
Effects Fuse Payload
Let's start with effects fuse which can be Flying Fish fuse or Falling Leaves fuse, both are available in a wide assortment of colors, some even have crackle effect!
You'll need to cut your effects fuse into small lengths approximately 3/4-inch long to be loaded into the canister. We also want to prime one end so they take fire easily. Always cut effects fuses with a sharp razor blade and never scissors which can, in some circumstances, lead to an accidental ignition! You are working outside with proper PPE right?

You'll need about 40 lengths of effects fuse per shell, and the amount you can fit depends on the effects fuse you are using. Some effects fuses, especially those with crackle effects can be pretty stout and may not permit 40 lengths to fit into your canisters.
With your fuses cut bundle them together and prime one end just as we did with the Visco delay fuse above. Primed fuses should be set aside to dry before being loaded into the canister shell. This is where using fast drying Nitrocellulose lacquer prime really shines as it dries quickly, usually in under 5 min.

With our effects fuse primed and dry, we are ready to weigh out our burst charge and start assembling. These small shells preform well with 2-4 grams of granulated black powder burst. Again this is a range and can be adjusted depending on the speed and performance of your black powder. Pour in the burst powder, then follow by packing the effects fuse around the Visco delay fuse. Don't pack it too tight, some air-space allows the burst to move around which aids in ignition.
With our shell loaded we can use hot glue to seal up our mini-shell. Apply the hot glue to the 3D printed plug and press it in. Remember if the seal is not fire-proof your shell could explode before it rises into the air.


Star Payload:
The process here is very similar to the effects fuse, except you'll be following the directions for the star kit you have chosen. When the stars are primed, and dry, weigh out your burst which again will likely be 2-4 grams depending on your black powders performance and how hard you would like to break your shell.
With the burst loaded, fill your shell with your stars leaving the top 1/2-inch of the shell empty to allow for the plug to be inserted. Hot glue the plug in place ensuring a good seal.

Loading Your Mini-Shell and Readying for Live Fire
Cut a long enough piece of Visco so you may safely get away without running. I find 5-inches of slow fuse or 12 inches of medium speed fuse gives me 10 seconds to casually move to a safe location. Your shoot site may require more time to retire to a safe location, adjust as needed. Insert this fuse into the passfire hole and secure with masking tape if necessary.
Load 2 grams of black powder into the open end of your mortar then insert your mini-shell fuse end down. If the shell and mortar assembly will be moved around a small amount of balled up paper can be pressed down on top of the shell to secure it in place.

The mortar should be placed on a flat, firm surface. If the tube is not secure brace it with sandbags to ensure it stays pointed in a safe direction.
When ready yell loudly "Fire in The Hole!" ignite the fuse and retire to a safe location to watch your homemade shell ascend into the air.
Once fired, check the tube for any burning embers, and clear the tube of any debris. Once this is completed your mortar tube can be reloaded and fired again and again.
Get the Supplies You Need to Make Your 3D Printed Mini Shells
3D Printed Mini Shells